
록키 리눅스 APM 설치[Rocky Linux 9.3]


록키 리눅스 APM 설치를 dnf 명령어를 이용해서 설치 해 보겠습니다. APM은 Apache, PHP, Mysql/MariaDB 의 약자로 웹 서버를 구축할 때 Apache 또는 Ngiinx, LiteSpeed 등에서 설치할 수 있습니다.
✅ 록키 리눅스 APM 설치를 위한 사전 환경 구성
dnf -y update
# 록키 리눅스9 epel, remi 저장소 추가
dnf install https://dl.fedoraproject.org/pub/epel/epel-release-latest-9.noarch.rpm
dnf -y install https://rpms.remirepo.net/enterprise/remi-release-9.rpmdnf --disablerepo="*" --enablerepo="remi-safe" list available✅ 사전 패키지 설치
dnf -y install gcc gcc-c++ pcre-devel make git openssl wget vim unzip GeoIP-devel git tree cmake expat-devel libxml2-devel openssl openssl-devel python3 curl gnupg2 libxslt-devel gd-devel perl-ExtUtils-Embed rsyslog✅ Apache 설치
dnf -y install httpd
### 종속성 설치:httpd 포함 12 패키지
Dependencies resolved.
=======================================================================================================
 Package                      Architecture      Version                     Repository            Size
=======================================================================================================
Installing:
 httpd                        x86_64            2.4.57-5.el9                appstream             46 k
Installing dependencies:
 apr                          x86_64            1.7.0-12.el9_3              appstream            122 k
 apr-util                     x86_64            1.6.1-23.el9                appstream             94 k
 apr-util-bdb                 x86_64            1.6.1-23.el9                appstream             12 k
 httpd-core                   x86_64            2.4.57-5.el9                appstream            1.4 M
 httpd-filesystem             noarch            2.4.57-5.el9                appstream             13 k
 httpd-tools                  x86_64            2.4.57-5.el9                appstream             80 k
 mailcap                      noarch            2.1.49-5.el9                baseos                32 k
 rocky-logos-httpd            noarch            90.14-2.el9                 appstream             24 k
Installing weak dependencies:
 apr-util-openssl             x86_64            1.6.1-23.el9                appstream             14 k
 mod_http2                    x86_64            1.15.19-5.el9               appstream            148 k
 mod_lua                      x86_64            2.4.57-5.el9                appstream             60 k

Transaction Summary
=======================================================================================================
Install  12 Packages
--------- 생략 ----------
# 아파치 버전 확인
httpd -v
Server version: Apache/2.4.57 (Rocky Linux)
Server built:   Jul 20 2023 00:00:00
✅ 마리아디비[MariaDB] 설치
dnf install -y mariadb-server mariadb
# 설치 확인
rpm -qa | grep  mariadb
# 버전 확인
mysql -V
mysql  Ver 15.1 Distrib 10.5.22-MariaDB, for Linux (x86_64) using  EditLine wrapper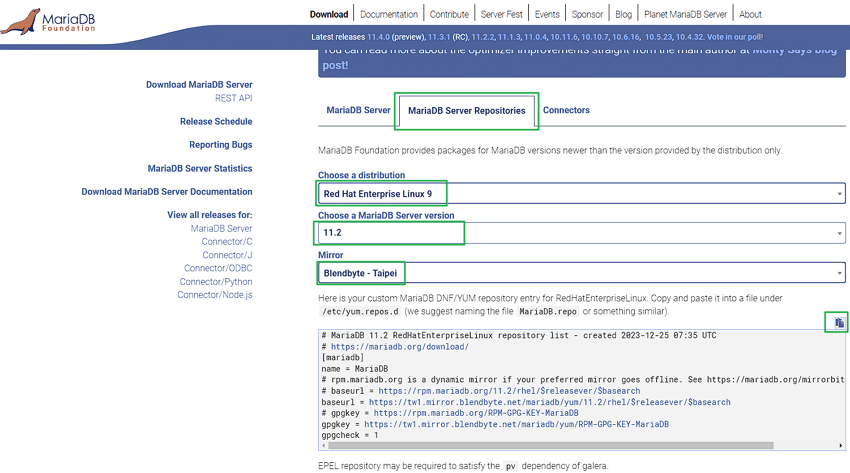
~]# vi /etc/yum.repos.d/MariaDB.repo

# MariaDB 11.2 RedHatEnterpriseLinux repository list - created 2023-12-25 07:35 UTC
# https://mariadb.org/download/
[mariadb]
name = MariaDB
# rpm.mariadb.org is a dynamic mirror if your preferred mirror goes offline. See https://mariadb.org/mirrorbits/ for details.
# baseurl = https://rpm.mariadb.org/11.2/rhel/$releasever/$basearch
baseurl = https://tw1.mirror.blendbyte.net/mariadb/yum/11.2/rhel/$releasever/$basearch
# gpgkey = https://rpm.mariadb.org/RPM-GPG-KEY-MariaDB
gpgkey = https://tw1.mirror.blendbyte.net/mariadb/yum/RPM-GPG-KEY-MariaDB
gpgcheck = 1

~]# dnf -y install mariadb-server mariadb
MariaDB                                                                                                                                                      278 kB/s | 624 kB     00:02
Last metadata expiration check: 0:00:01 ago on Mon Dec 25 07:59:44 2023.
Dependencies resolved.
=============================================================================================================================================================================================
 Package                                               Architecture                           Version                                        Repository                                 Size
=============================================================================================================================================================================================
Installing:
 MariaDB-client                                        x86_64                                 11.2.2-1.el9                                   mariadb                                   9.1 k
 pv                                                    x86_64                                 1.6.20-1.el9                                   epel                                       65 k
--------- 생략 ----------
Transaction Summary
=============================================================================================================================================================================================
Install  16 Packages

Total download size: 31 M
Installed size: 241 M
--------- 생략 ----------~]# mysql -V
mysql: Deprecated program name. It will be removed in a future release, use '/usr/bin/mariadb' instead
mysql from 11.2.2-MariaDB, client 15.2 for Linux (x86_64) using EditLine wrapper
~]# mariadb -V
mariadb from 11.2.2-MariaDB, client 15.2 for Linux (x86_64) using EditLine wrapper✅ PHP 설치
dnf module list php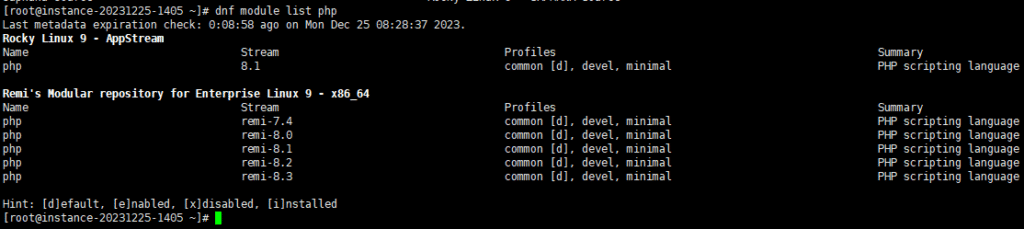
dnf module list php
# PHP 버전 활성화 및 비활성화 명령어
dnf module enable php:remi-8.2
dnf module disable php:remi-8.2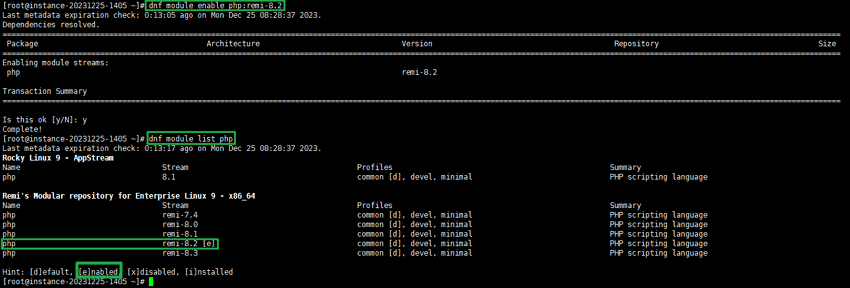
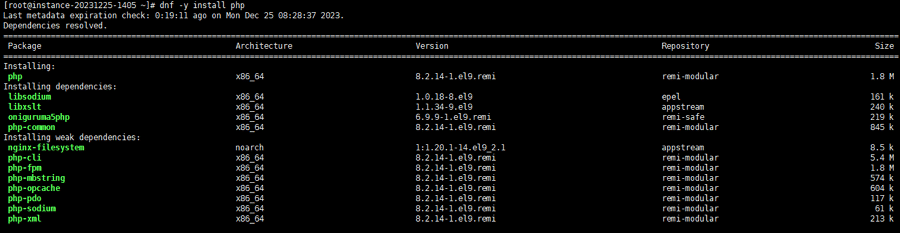
~]# php -v
PHP 8.2.14 (cli) (built: Dec 20 2023 06:28:06) (NTS gcc x86_64)
Copyright (c) The PHP Group
Zend Engine v4.2.14, Copyright (c) Zend Technologies
    with Zend OPcache v8.2.14, Copyright (c), by Zend Technologies
## 워드프레스를 포함한 CMS에서 503 에러 발생 시
## 워드프레스의 경우 mysqli가 설치되어 있지 않다는 오류가 발생할 수 있음.
almalinux 포함하여 mysqli 설치가 되어야 하며, mysqli 설치 시 종속석으로 mysqlnd가 같이 설치된다.
dnf -y install php-mysqli 록키 리눅스 APM 설치가 완료 되었습니다.
✅ 록키 리눅스 APM 설치 설정 및 구동
1. apache 설정 및 구동
아파치 설정을 httpd.conf 파일에서 진행합니다.
~]# vi /etc/httpd/conf/httpd.conf

## apache → nobody 변경
71 User nobody
72 Group nobody

## 도메인 또는 해당 서버 IP 입력 추가
100 #ServerName www.example.com:80
101 ServerName 152.xx.xxx.xx:80

##  index.htm index.php 추가 > 디렉토리 내 아파치에 제공할 index 확장자 설정 추가
168 <IfModule dir_module>
169     DirectoryIndex index.html index.htm index.php
170 </IfModule>

# AddType application/x-httpd-php .php / AddType application/x-httpd-phps .phps 추가
# 아파치에서 php관련된 처리를 할 수 있게 설정한 값
288     AddType application/x-compress .Z
289     AddType application/x-gzip .gz .tgz
290     AddType application/x-httpd-php .php
291     AddType application/x-httpd-phps .phps

# 아파치 시작 / 중지: stop / 재시작 restart
~]# systemctl start httpd
# 부팅 후 자동 실행 설정 / 비활성화: disable]
~]# systemctl enable httpd
구동 확인이 되는지 ps -ef 명령어로 확인합니다.
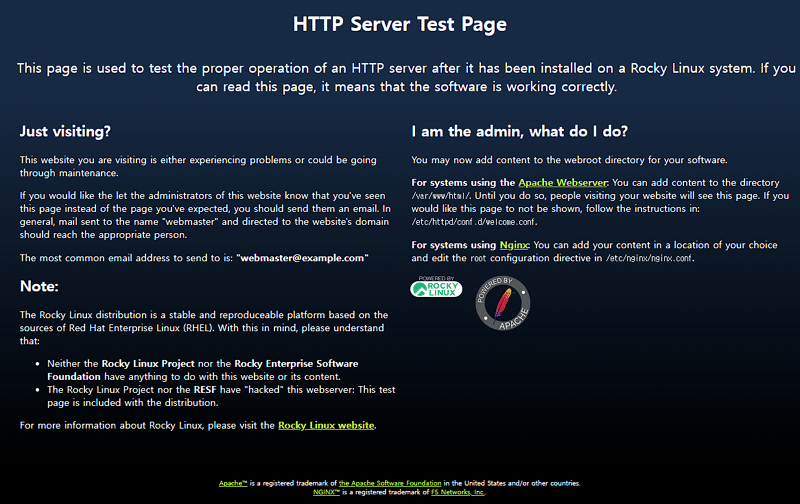
소개 페이지가 나오는 것까지 확인합니다. 나머지 설정을 해서 사이트가 정상적으로 나올 수 있도록 하겠습니다.
~]# vi /etc/httpd/conf/httpd.conf
## 기존 디렉토리 설정을 원하는 디렉토리 설정으로 변경
#<Directory "/var/www">
#    AllowOverride None
    # Allow open access:
#    Require all granted
#</Directory>

<Directory "/home/">
    AllowOverride None
    # Allow open access:
    Require all granted
</Directory>

# Further relax access to the default document root:
#<Directory "/var/www/html">
<Directory "home">
    Options Indexes FollowSymLinks

    #
    # AllowOverride controls what directives may be placed in .htaccess files.
    # It can be "All", "None", or any combination of the keywords:
    #   Options FileInfo AuthConfig Limit
    #
    AllowOverride None

    #
    # Controls who can get stuff from this server.
    #
    Require all granted
</Directory>
vi /etc/httpd/conf.d/virtual.conf
<VirtualHost *:80>
ServerName www.domain.com
ServerAlias domain.com
DocumentRoot /home/userid/www
<Directory /home/userid/www>
Options -Indexes +FollowSymLinks
AllowOverride All
</Directory>
</VirtualHost> 2. MariaDB 구동
# 구동
systemctl start mariadb
# 부팅 시 자동 재 시작
systemctl enable mariadb
# 마리아 DB 환경 설정 파일 경로
vi /etc/my.cnf
록키 리눅스 APM 설치 완료 후 추가로 발생하는 오류가 있을 수 있습니다. 중간에 빠진 부분이 있는지 추가 확인 사항을 체크해 갈 수 있습니다. 잘못 설정한 부분을 찾을 수 없다면 재설치를 고려해 볼 수 있습니다.
ℹ️ 제휴 안내
본 사이트의 콘텐츠에는 제휴 링크가 포함되어 있습니다. 방문자가 이 링크를 통해 상품 또는 서비스를 구매하면 본 사이트는 판매처로부터 수수료를 지급받습니다. 이 과정에서 구매자가 지불하는 금액(이벤트 할인 시 금액이 내려갑니다↓)은 오르지 않습니다. 게시된 가격·할인·재고 정보는 작성 시점 기준이며 실제와 다를 수 있으므로, 구매 전 판매처에서 최종 확인하시기 바랍니다. 상품 선정과 평가는 자체 기준에 따라 작성되며, 수수료 지급 여부가 소개 순서나 평가 내용에 영향을 주지 않습니다.