
lsblk Command: Checking Disk and Partition Layout and UUIDs
The lsblk command prints the disks and partitions connected to a server and their mount points as a tree, and shows disk sizes, file system types, and even UUIDs at a glance. When we ran lsblk on an AlmaLinux 9 server, the loop devices created by snap packages were listed before the disk, so we filtered them out with -e 7. Then we used -f to check the xfs file system and UUID of the root partition.
The disk sizes and UUIDs in the output below are example values.
1️⃣ Reading the basic output of the lsblk command
On a server where programs were installed with snap, running lsblk without options lists a loop device mounted for each package version before the disk, so specify 7, the device number of loop devices, with -e to leave them out.
lsblk -e 7NAME MAJ:MIN RM SIZE RO TYPE MOUNTPOINTS
nvme0n1 259:0 0 80G 0 disk
├─nvme0n1p1 259:1 0 1M 0 part
├─nvme0n1p2 259:2 0 200M 0 part /boot/efi
├─nvme0n1p3 259:3 0 1G 0 part /boot
└─nvme0n1p4 259:4 0 78.8G 0 part /nvme0n1 in the NAME column is the disk. nvme0n1p1 through nvme0n1p4, connected below it with [├─] and [└─], are the partitions that divide this disk. It is like the floor directory at a building entrance, which lists what is on each floor under the name of the building.
In the TYPE column, disks appear as [disk] and partitions as [part], and the MOUNTPOINTS column shows the folder where each partition is mounted. On the server we checked, the root partition nvme0n1p4 was mounted on / and nvme0n1p3 on /boot. The 1M nvme0n1p1 is a BIOS boot partition used for booting from a GPT disk, so it has no mount point.
MAJ:MIN are the major and minor numbers the kernel assigns to a device; loop devices are 7, and the NVMe disk we checked was 259. RM shows whether a device is removable and RO whether it is read-only, as 1 or 0.
It is easy to read SIZE as free space, but SIZE is the total size of the disk or partition. Check the free space of a file system in the FSAVAIL column, which appears when you add -f.
The diagram below lets you compare, step by step, how the rows and columns in the output change with each option.
2️⃣ lsblk -f: checking file systems and UUIDs
The basic output does not show file system types, so use -f to check how a partition was formatted. -f prints eight columns: NAME, FSTYPE, FSVER, LABEL, UUID, FSAVAIL, FSUSE%, and MOUNTPOINTS.
lsblk -f -e 7NAME FSTYPE FSVER LABEL UUID FSAVAIL FSUSE% MOUNTPOINTS
nvme0n1
├─nvme0n1p1
├─nvme0n1p2 vfat FAT16 5A1E-3B7C 192.1M 4% /boot/efi
├─nvme0n1p3 xfs 6d2f0c4e-8b1a-4f3d-a7e2-9c5b1d0e4f28 691.4M 28% /boot
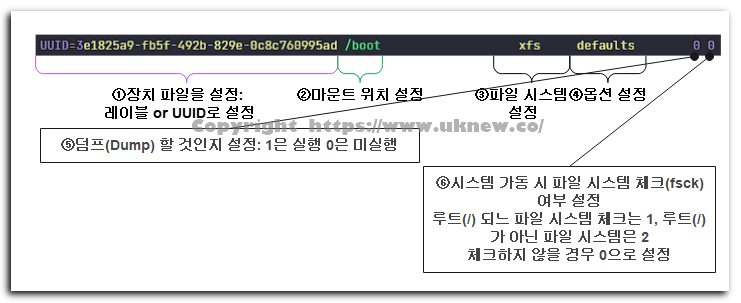
└─nvme0n1p4 xfs 2b9e7f41-c3d6-4a85-b0f1-7e4a2c9d6b13 68.5G 13% /When we ran it, the root and /boot partitions were xfs, and /boot/efi was vfat in the FAT16 version. The disk nvme0n1 and nvme0n1p1 have no file system, so they were left blank. A UUID is a unique number given to each file system, and /etc/fstab uses it to specify the partition to mount by UUID instead of by device name.
To check file system information most accurately, the blkid command is the one to use.
FSAVAIL and FSUSE% are the free space and usage rate of a mounted file system. Partitions that are not mounted show no values. The df command prints only the size and usage of mounted file systems. lsblk prints the disk and partition layout as well, whether or not they are mounted.
3️⃣ lsblk -o to choose columns and -b for bytes
Write column names after -o, separated by commas, and only those columns appear in that order. The available column names are listed at the end of [lsblk --help].
lsblk -o NAME,SIZE,FSTYPE,MOUNTPOINT -e 7NAME SIZE FSTYPE MOUNTPOINT
nvme0n1 80G
├─nvme0n1p1 1M
├─nvme0n1p2 200M vfat /boot/efi
├─nvme0n1p3 1G xfs /boot
└─nvme0n1p4 78.8G xfs /MOUNTPOINT prints only one mount point, while MOUNTPOINTS prints all of them when the same file system is mounted in several places. To add just one column after the default columns, put + in front of the column name, as in [-o +UUID].
-b prints sizes as integers in bytes. The default units are easier to read when comparing by eye, so -b suits scripts that calculate or compare sizes.
lsblk -b -o NAME,SIZE -e 7NAME SIZE
nvme0n1 85899345920
├─nvme0n1p1 1048576
├─nvme0n1p2 209715200
├─nvme0n1p3 1073741824
└─nvme0n1p4 84613774848G and M in the default output are units of 1,024, so the 80G disk appears as 85,899,345,920 bytes.
4️⃣ lsblk -d for a disk list and -p for full paths
On a server with several disks, the partition lines get mixed in and make the disk list hard to read, so use -d to leave out the partitions and print only the disk lines.
lsblk -d -e 7NAME MAJ:MIN RM SIZE RO TYPE MOUNTPOINTS
nvme0n1 259:0 0 80G 0 disk Only the single line for the disk nvme0n1 remained in the output, and the four partition lines below it did not appear.
With -p, /dev/ is added in front of device names, and they appear as full paths. You can pass these paths straight to other commands such as mount.
lsblk -p -e 7NAME MAJ:MIN RM SIZE RO TYPE MOUNTPOINTS
/dev/nvme0n1 259:0 0 80G 0 disk
├─/dev/nvme0n1p1 259:1 0 1M 0 part
├─/dev/nvme0n1p2 259:2 0 200M 0 part /boot/efi
├─/dev/nvme0n1p3 259:3 0 1G 0 part /boot
└─/dev/nvme0n1p4 259:4 0 78.8G 0 part /Only the NAME column changes to full paths, from /dev/nvme0n1 to /dev/nvme0n1p4, and the other columns are the same as in the default output.
If you pass a device path as an argument, only that device and the partitions below it are printed; if you pass a partition path, only that one partition line appears.
lsblk /dev/nvme0n1p4NAME MAJ:MIN RM SIZE RO TYPE MOUNTPOINTS
nvme0n1p4 259:4 0 78.8G 0 part /Only the one line for nvme0n1p4 appears in the output, without the disk line or branch marks. When we passed a device path that does not exist, a [not a block device] error appeared and the exit code was 32.
5️⃣ lsblk command output and options for scripts
It is tempting to cut up the default output in scripts, but the column layout of the default output and of -f may change in the future, so in scripts specify the columns yourself with -o.
-n leaves out the header line and prints only the values, so it suits cases where you need a single value, such as the file system type of one partition.
lsblk -no FSTYPE /dev/nvme0n1p4xfsWith no header line, only one word appears, xfs, the file system type of the root partition, so you can store it directly in a shell variable.
-P prints each column in the form [name=”value”] on one line. In util-linux 2.37 on AlmaLinux 9, adding -P alone renames columns so they are easy to read as shell variables, such as MAJ:MIN to MAJ_MIN and FSUSE% to FSUSE_PCT.
lsblk -P -o NAME,FSTYPE,MOUNTPOINT /dev/nvme0n1p4NAME="nvme0n1p4" FSTYPE="xfs" MOUNTPOINT="/"The three columns you specified appear on one line in the order NAME, FSTYPE, MOUNTPOINT. All values are enclosed in double quotes.
-J prints JSON. Without -d, partitions go into the children array under the disk. Used together with -b, only size turns into a number, and other size columns such as FSAVAIL stay strings.
lsblk -J -d -o NAME,SIZE,TYPE -e 7{
"blockdevices": [
{
"name": "nvme0n1",
"size": "80G",
"type": "disk"
}
]
}With -d, the blockdevices array holds only the disk, and the children array does not appear.
🔲 lsblk command options
| Option | Copy | Description |
|---|---|---|
| -e, --exclude | Excludes devices with the given major number. Specifying 7 leaves out loop devices. | |
| -f, --fs | Prints the file system type, UUID, free space, and usage rate. | |
| -o, --output | Prints only the columns given, separated by commas, in that order. | |
| -b, --bytes | Prints the SIZE column as integers in bytes. | |
| -d, --nodeps | Leaves out partition lines and prints only disk lines. | |
| -p, --paths | Prints device names as full paths starting with /dev/. | |
| -n, --noheadings | Leaves out the header line and prints only the values. | |
| -P, --pairs | Prints column names and values in pairs on one line. | |
| -J, --json | Prints in JSON format. | |
| -a, --all | Also prints empty devices with a size of 0. |
| Option | Copy | Description |
|---|---|---|
| -I, --include | Prints only devices with the given major number. | |
| -l, --list | Prints in list format instead of a tree. | |
| -r, --raw | Prints in raw format without aligning the columns. | |
| -i, --ascii | Prints the tree lines with ASCII characters. | |
| -s, --inverse | Reverses the dependencies and prints disks below partitions. | |
| -S, --scsi | Prints only SCSI device information. | |
| -t, --topology | Prints topology information such as sector size and I/O scheduler. | |
| -m, --perms | Prints the owner, group, and permissions of devices. | |
| -x, --sort | Sorts by the given column and prints in list format. | |
| -O, --output-all | Prints all available columns. |
🔲 lsblk command simulator
In the simulator below, you can type the commands so far yourself and see how the output changes with each option.
🔢 FAQ & Recommended Content
 Linux · Swap
Setting Up Swap Memory
How to create swap memory as a partition or as a file with the mkswap and swapon commands.
 Linux · Disk
Linux dd Command
Basic usage, options, and examples of the dd command, used to clone disks and partitions or create image files.
 Disk · Concept
What Is a Disk Sector?
Explains the basic structure of a hard disk and what a disk sector is: a division of the storage medium into units of a fixed size.
ℹ️ Affiliate Disclosure
This site's content contains affiliate links. When a visitor buys a product or service through one of them, the site receives a commission from the seller. The amount the buyer pays(it goes down during event discounts ↓)does not go up. Posted prices, discounts, and stock reflect the time of writing and may differ, so confirm with the seller before buying. Products are chosen and reviewed by our own standards, and commissions do not affect the order or content of reviews.