
SSH Command: How to Use the -l, -p, and -i Options and Check Connection Errors
The SSH command is the OpenSSH client command that connects to a remote Linux server over an encrypted connection in the form ssh account@server-address and runs commands on the server it connects to. We ran ssh from an AlmaLinux 9 server to a Debian 12 server and checked, in order, everything from the host key check on the first connection to the -l, -p, and -i options, remote command execution, and -v debug output. We found that how options are actually applied can be checked in advance with ssh -G, without connecting.
The output below is exactly what we got on the two servers. The server address, account, host name, key path and key fingerprint, and the OpenSSL and kernel version numbers of the connecting server have been replaced with example values. The connecting AlmaLinux server uses the root account, and the receiving Debian server uses a regular account.
1️⃣ Basic usage of the SSH command
To log in to a remote server, write the account name and server address after ssh, joined with @. Once you log in, the prompt changes to that of the server you connected to, and entering exit closes the connection and takes you back to the original server.
ssh user@192.0.2.10Linux server2 6.1.0-53-amd64 #1 SMP PREEMPT_DYNAMIC Debian 6.1.187-1 (2026-09-07) x86_64
Last login: Wed Oct 28 20:27:41 2026 from 198.51.100.7
[user]:~$ whoami
user
[user]:~$ exit
exit
Connection to 192.0.2.10 closed.The Debian server we connected to also showed a few lines of server notice (motd) and a mail notification at login; only those lines were removed from the output above.
When you connect to a server for the first time, ssh prints the server's host key fingerprint before login and asks whether to continue connecting. When we entered yes, the host key was saved to ~/.ssh/known_hosts, and then the whoami result appeared.
ssh user@192.0.2.10 whoamiThe authenticity of host '192.0.2.10 (192.0.2.10)' can't be established.
ED25519 key fingerprint is SHA256:9fT2kL0qX8vN4cR1yB6sW3mZ7aH5dE0uJ2pG8oK1iVc.
This key is not known by any other names.
Are you sure you want to continue connecting (yes/no/[fingerprint])? yes
Warning: Permanently added '192.0.2.10' (ED25519) to the list of known hosts.
userOnce the key was saved in known_hosts, the question did not appear again when we connected to the same server. If the fingerprint differs from the value you received from the server administrator, enter no. When we entered no, ssh ended without connecting.
ssh user@192.0.2.10The authenticity of host '192.0.2.10 (192.0.2.10)' can't be established.
ED25519 key fingerprint is SHA256:9fT2kL0qX8vN4cR1yB6sW3mZ7aH5dE0uJ2pG8oK1iVc.
This key is not known by any other names.
Are you sure you want to continue connecting (yes/no/[fingerprint])? no
Host key verification failed.When we ended with no, the known_hosts file was not created. So the same question appears again on the next connection.
2️⃣ SSH command options
ssh options go before the connection target. Running ssh by itself printed the list of available options as usage text.
sshusage: ssh [-46AaCfGgKkMNnqsTtVvXxYy] [-B bind_interface] [-b bind_address]
[-c cipher_spec] [-D [bind_address:]port] [-E log_file]
[-e escape_char] [-F configfile] [-I pkcs11] [-i identity_file]
[-J destination] [-L address] [-l login_name] [-m mac_spec]
[-O ctl_cmd] [-o option] [-P tag] [-p port] [-R address]
[-S ctl_path] [-W host:port] [-w local_tun[:remote_tun]]
destination [command [argument ...]]
ssh [-Q query_option]If you pass an option that is not in the usage text, an [unknown option] error appears along with the same usage text.
-V prints the installed OpenSSH client version. Below is the result from the connecting AlmaLinux server; the receiving Debian 12 server showed OpenSSH_9.2p1.
ssh -VOpenSSH_9.9p1, OpenSSL 3.5.1 1 Jul 2025-G does not connect to the server; it combines the options you gave with the configuration files and prints the values that will actually be applied. The full output is 87 lines, so we pick only the lines we need with grep.
ssh -G user@example.com | grep -E "^(user|hostname|port|identityfile|connecttimeout|stricthostkeychecking|serveraliveinterval) "user user
hostname example.com
port 22
stricthostkeychecking ask
serveraliveinterval 0
identityfile ~/.ssh/id_rsa
identityfile ~/.ssh/id_ecdsa
identityfile ~/.ssh/id_ecdsa_sk
identityfile ~/.ssh/id_ed25519
identityfile ~/.ssh/id_ed25519_sk
identityfile ~/.ssh/id_xmss
identityfile ~/.ssh/id_dsa
connecttimeout noneThe seven identityfile lines are the default key files ssh looks for in order when -i is not given. connecttimeout none means no connection wait time has been set.
| Option | Copy | Description |
|---|---|---|
| -lAccount | Specifies the account name to connect as | |
| -pPort | Specifies the port to connect to (default 22) | |
| -iKey file | Specifies the private key file | |
| -v | Prints the connection process as debug1 lines | |
| -C | Compresses the data exchanged | |
| -X | X11 forwarding (remote GUI programs) | |
| -T | Does not allocate a pseudo-terminal | |
| -t | Forces pseudo-terminal allocation | |
| -n | Redirects standard input to /dev/null | |
| -q | Suppresses warnings and informational messages | |
| -okey=value | Sets a configuration file option for this connection only | |
| -L | Local port forwarding | |
| -F | Specifies the configuration file | |
| -G | Prints the settings that would apply, without connecting | |
| -V | Prints the OpenSSH client version |
| Option | Copy | Description |
|---|---|---|
| -N | Keeps the connection open without a remote command | |
| -J | Connects through another server |
3️⃣ The ssh -l option and -L port forwarding
-l is the option that specifies the account name to connect as. ssh -l user 192.0.2.10 connected with the same account as ssh user@192.0.2.10.
ssh -l user 192.0.2.10 whoamiuserChecking with -G showed that the account given with -l went into the user entry.
ssh -G -l admin example.com | grep -E "^(user|hostname|port) "user admin
hostname example.com
port 22We also used -G to check which one applies when you give both -l and account@address. On OpenSSH 9.9p1, admin, given with -l, was applied.
ssh -G -l admin user@example.com | grep -E "^(user|hostname) "user admin
hostname example.comUppercase -L has a similar name but is a local port forwarding option unrelated to the account. It passes connections arriving at a port on your server through the SSH connection and connects them to an address and port on the remote server side.
8080:localhost:80 means connecting port 8080 on your server to port 80 of localhost as seen from the remote server. Checking with -G showed the same value in the localforward entry.
ssh -G -L 8080:localhost:80 user@example.com | grep -E "^(hostname|localforward) "hostname example.com
localforward 8080 [localhost]:80When you only want to keep a tunnel open, add -N, which keeps the connection open without a remote command.
4️⃣ Specifying the SSH port and key file
If the SSH server accepts connections on a port other than 22, specify the port with -p. -i specifies a private key file that does not have a default name.
ssh -G -p 2222 -i ./mykey user@example.com | grep -E "^(user|hostname|port|identityfile) "user user
hostname example.com
port 2222
identityfile ./mykeyWhen we specified -i, the seven default key file lines disappeared and only the specified file remained.
Key files are created with ssh-keygen. If you already use a key, give a new file name with -f. Below is the result of creating an ed25519 key with the new name mykey.
ssh-keygen -t ed25519 -f ./mykey -N "" -C "user@example.com"Generating public/private ed25519 key pair.
Your identification has been saved in ./mykey
Your public key has been saved in ./mykey.pub
The key fingerprint is:
SHA256:XLbhLZHSNdMvUqhSIbzRNJi/zKKkNnWmy0mTeBoUfaY user@example.com
The key's randomart image is:
+--[ED25519 256]--+
| ..=+.+o |
| . =oo+.oo |
| . . +=B. . . |
| . =o=o=. . .|
| . E S++... . |
| . .o.+ +. |
| o+== . |
| +*oo |
| ...+. |
+----[SHA256]-----+mykey is the private key and mykey.pub is the public key. The OpenSSH manual says to put the public key in ~/.ssh/authorized_keys on the server you will connect to. You can do this with ssh-copy-id, as in [ssh-copy-id -i ./mykey.pub user@192.0.2.10].
If you connect to the same server often, write an alias in ~/.ssh/config and just enter ssh followed by the alias. The Host line is the alias, and the lines below it are the values applied when you connect with that alias.
Host myserver
    HostName 192.0.2.10
    User user
    Port 2222
    IdentityFile ~/.ssh/mykey
When we wrote these settings in a ./config file and read it with -F, the address, account, port, and key file were all applied through a single alias.
ssh -F ./config -G myserver | grep -E "^(user|hostname|port|identityfile) "user user
hostname 192.0.2.10
port 2222
identityfile ~/.ssh/mykeyOptions given on the command line take precedence over the configuration file. When we added -p 22 to the same alias, port changed to 22.
ssh -F ./config -G -p 22 myserver | grep -E "^(hostname|port) "hostname 192.0.2.10
port 22hostname stayed at 192.0.2.10 from the configuration file, and only port changed to the value given on the command line.
5️⃣ Running remote commands with SSH
If you write a command after the connection target, ssh runs only that command without a login screen and then closes the connection. If there are several commands or shell symbols such as a semicolon, wrap them in single quotes.
ssh user@192.0.2.10 'whoami; hostname'user
server2The exit code of the remote command came back unchanged as the exit code of ssh. In scripts, this value tells you whether the remote command succeeded.
ssh user@192.0.2.10 'exit 3'; echo $?3When you run a command this way, no pseudo-terminal is allocated. tty run with -T printed [not a tty].
ssh -T user@192.0.2.10 ttynot a ttyThe ssh manual describes -t as the option to use when running screen-based programs on the remote server. With -t, /dev/pts/0 appeared, and a message saying the connection was closed appeared at the end.
ssh -t user@192.0.2.10 tty/dev/pts/0
Connection to 192.0.2.10 closed.Adding -q kept this message from appearing.
ssh -t -q user@192.0.2.10 tty/dev/pts/0-n redirects the standard input of ssh to /dev/null. Without -n, the remote cat printed the hello passed through the pipe as is.
echo hello | ssh user@192.0.2.10 cathelloecho hello | ssh -n user@192.0.2.10 catAdding -n to the same command kept hello from reaching the remote cat, so nothing was printed.
6️⃣ SSH connection errors and ssh -v debugging
When you cannot connect, first check the error message to see at which stage it stopped. When the server address could not be found, [Could not resolve hostname] appeared.
ssh user@nosuchhost.invalidssh: Could not resolve hostname nosuchhost.invalid: Name or service not knownIf the address is correct but nothing answers on that port, [Connection timed out] appears. With -o ConnectTimeout=5, it ended with this error after 5 seconds.
ssh -o ConnectTimeout=5 -p 2222 user@192.0.2.10ssh: connect to host 192.0.2.10 port 2222: Connection timed outWhen we connected with -o BatchMode=yes to a server not in known_hosts, ssh ended with [Host key verification failed.] without asking about the host key. To keep the first connection in a script from stopping at the question, use StrictHostKeyChecking=accept-new.
ssh -o BatchMode=yes user@192.0.2.10 trueHost key verification failed.According to the ssh_config manual, accept-new saves the host key of a server it has not seen before without asking. If a key different from the saved one arrives, it refuses the connection.
ssh -o StrictHostKeyChecking=accept-new user@192.0.2.10 whoamiWarning: Permanently added '192.0.2.10' (ED25519) to the list of known hosts.
userIf no key is registered for the account, [Permission denied (publickey)] appears. Repeated authentication failures can make the server block the connecting IP.
-v prints the connection process as debug1 lines. The full output is over 70 lines, so below are only the lines for the connection and authentication stages, picked with grep.
ssh -v -i ~/.ssh/id_ed25519 user@192.0.2.10 true 2>&1 | grep -E 'Connecting to|Connection established|remote software version|Server host key|is known and matches|can continue|Offering public key|Authenticated to|Exit status'debug1: Connecting to 192.0.2.10 [192.0.2.10] port 22.
debug1: Connection established.
debug1: Remote protocol version 2.0, remote software version OpenSSH_9.2p1 Debian-2+deb12u10
debug1: Server host key: ssh-ed25519 SHA256:9fT2kL0qX8vN4cR1yB6sW3mZ7aH5dE0uJ2pG8oK1iVc
debug1: Host '192.0.2.10' is known and matches the ED25519 host key.
debug1: Authentications that can continue: publickey,password
debug1: Offering public key: /root/.ssh/id_ed25519 ED25519 SHA256:4bN7qT1xW9cK3mR6yH0sD2fL8vZ5aJ1eP7uG3oX4iQs explicit
Authenticated to 192.0.2.10 ([192.0.2.10]:22) using "publickey".
debug1: Exit status 0The Connecting to line is the connection attempt, and the Server host key and is known and matches lines are the host key check. The key was offered in the Offering public key line, and key authentication finished in the Authenticated to line. If it stops at authentication, first check whether the key file you want appears in the Offering public key line.
Adding -C changed the compression value in the kex line from none to zlib@openssh.com.
ssh -v -C user@192.0.2.10 true 2>&1 | grep -E 'compression'debug1: kex: server->client cipher: aes256-gcm@openssh.com MAC: <implicit> compression: zlib@openssh.com
debug1: kex: client->server cipher: aes256-gcm@openssh.com MAC: <implicit> compression: zlib@openssh.com
debug1: Enabling compression at level 6.-X is the option that brings the screens of GUI programs on the remote server to your computer. Running it on an AlmaLinux server with no display produced a debug1 line saying there is no DISPLAY.
ssh -v -X user@192.0.2.10 true 2>&1 | grep DISPLAYdebug1: X11 forwarding requested but DISPLAY not setDISPLAY is the environment variable that sets where GUI screens are shown. That is why -X is used when connecting from a computer with a desktop screen.
🔲 SSH command simulator
In the simulator below, you can connect to a virtual server with ssh and try options, remote commands, and ssh -G by typing them yourself.
🔢 FAQ & Recommended Content

 SSH
Linux SSH: Definition and Basic Setup
An article on the background of SSH, which replaced unencrypted Telnet, along with its default port 22, key authentication, and installation.
 Security
OpenSSH Vulnerability CVE-2024-6387: Temporary Mitigation and Patching
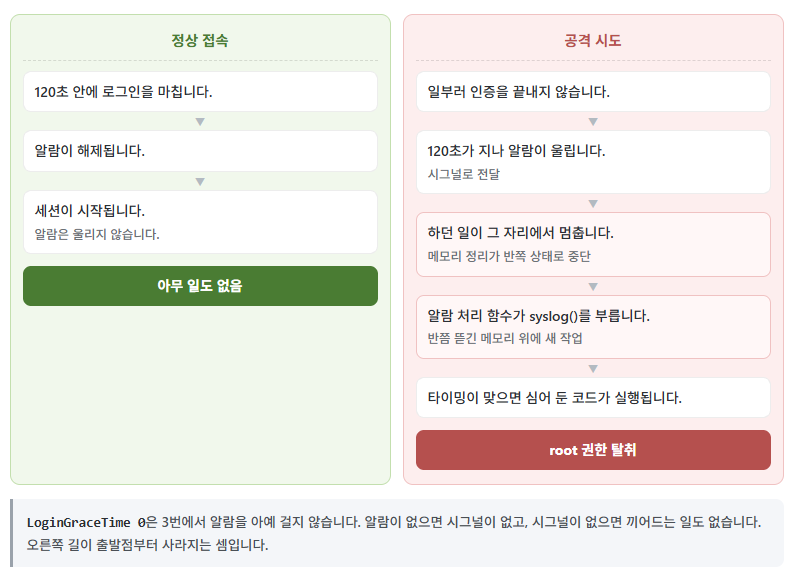
An article on how the OpenSSH vulnerability regreSSHion exploits the alarm signal of the login grace time, and the order in which we applied a temporary block and then the patch.
 Cloudways
How to Connect to Cloudways via SFTP & SSH: FileZilla Setup, SSH Key Registration, and IP Whitelisting
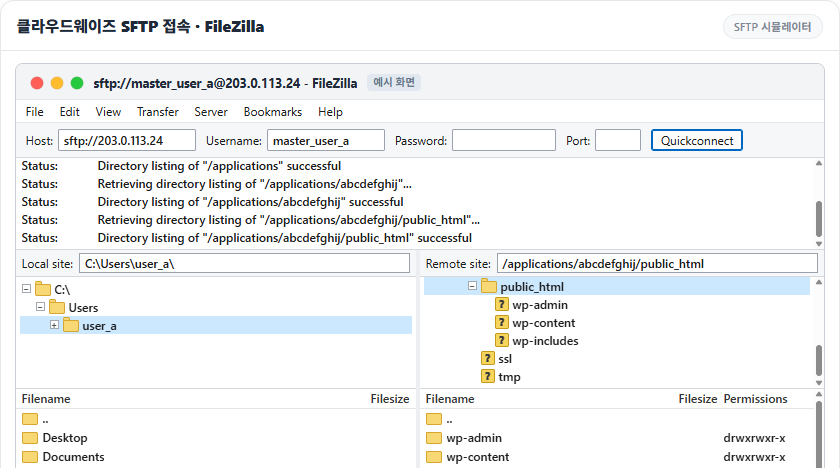
An article on registering an SSH key on a managed cloud server, adding the connecting IP to the whitelist, and then connecting with ssh and FileZilla.
ℹ️ Affiliate Disclosure
This site's content contains affiliate links. When a visitor buys a product or service through one of them, the site receives a commission from the seller. The amount the buyer pays(it goes down during event discounts ↓)does not go up. Posted prices, discounts, and stock reflect the time of writing and may differ, so confirm with the seller before buying. Products are chosen and reviewed by our own standards, and commissions do not affect the order or content of reviews.